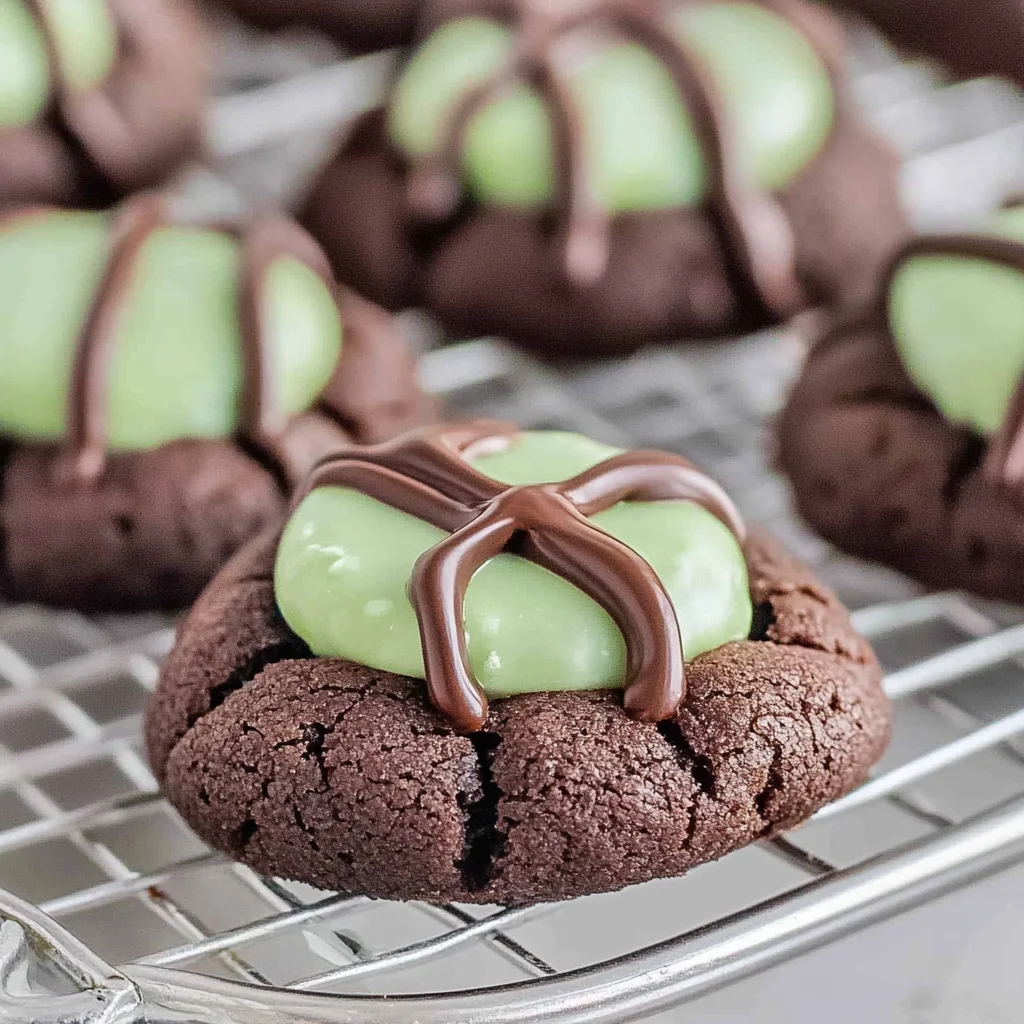
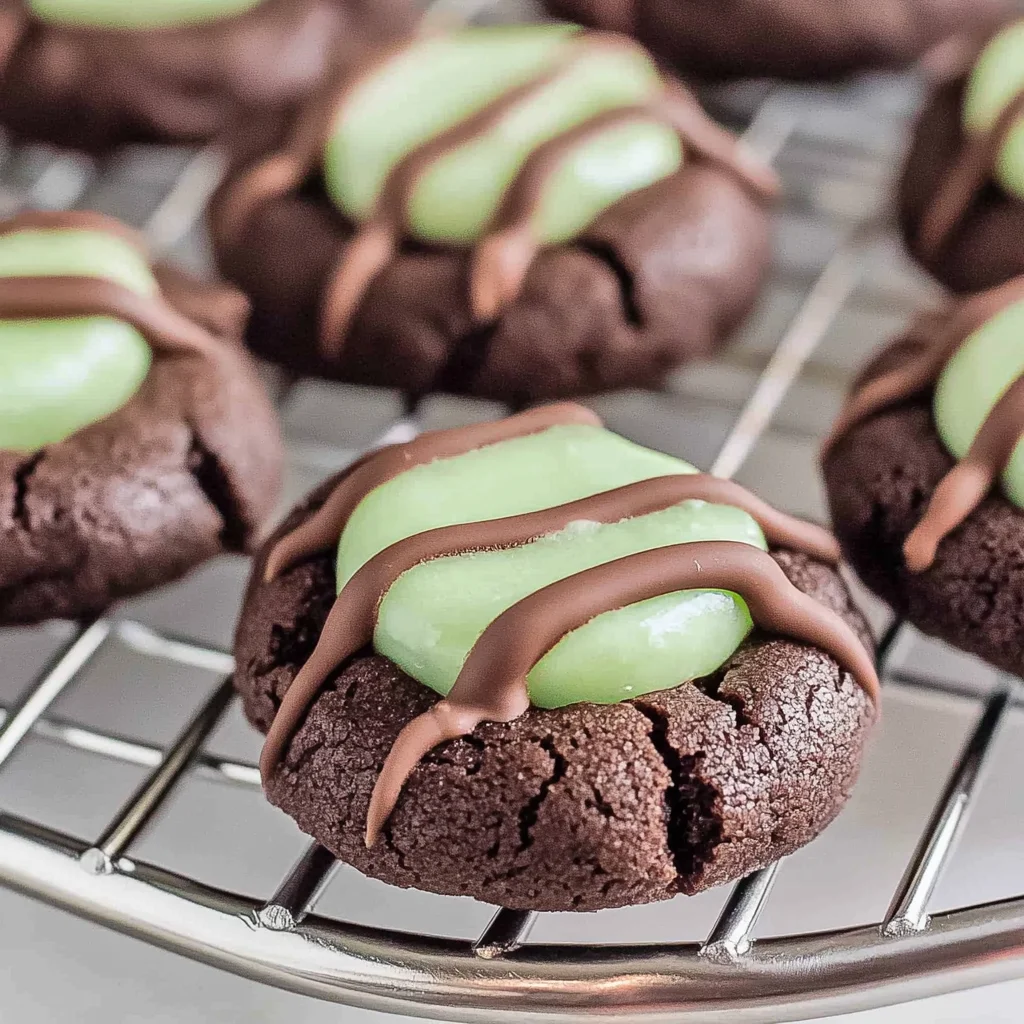
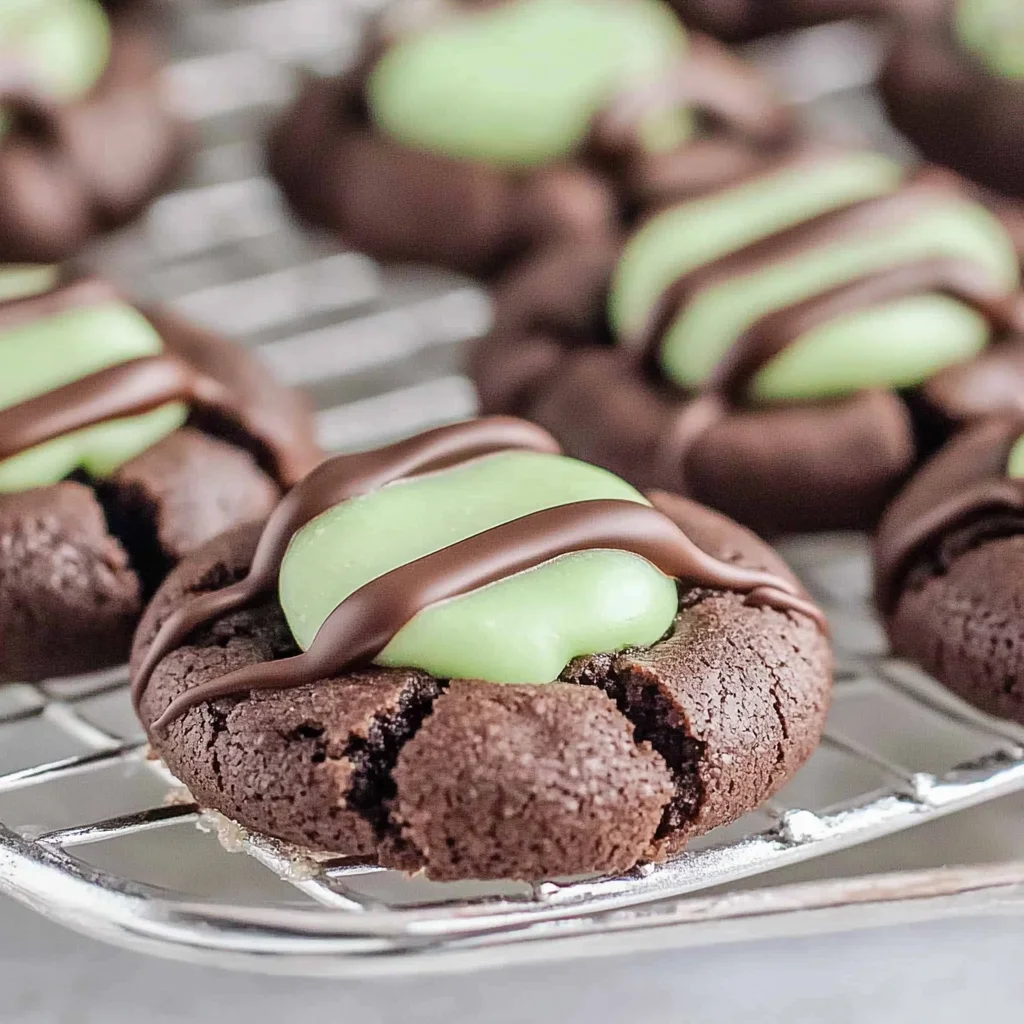
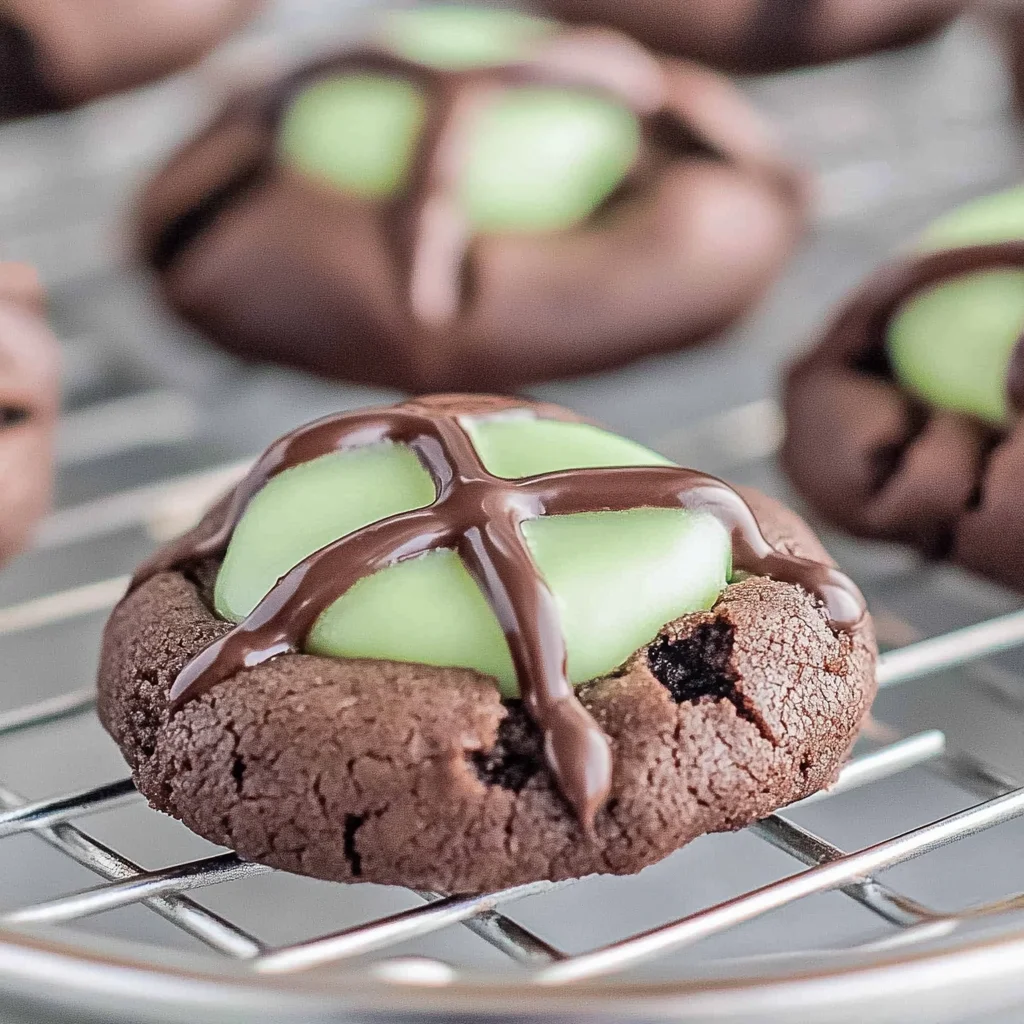
Chocolate Mint Thumbprint Cookies are a delightful treat that brings together rich chocolate and refreshing mint flavors. Perfect for holidays or any festive gathering, these cookies feature a soft, chocolatey base with a luscious mint fudge center topped with a drizzle of chocolate. Their unique combination of textures and tastes makes them an irresistible addition to your dessert table.
Why You’ll Love This Recipe
- Irresistible Flavor: The blend of chocolate and mint creates a flavor profile that is both rich and refreshing.
- Easy to Make: With simple ingredients and straightforward steps, even novice bakers can enjoy making these cookies.
- Festive Appeal: The vibrant green fudge center makes these cookies visually appealing, perfect for holiday gatherings or special occasions.
- Versatile Treat: These cookies can be customized with different colors or toppings, making them suitable for various themes and celebrations.
- Batch Friendly: This recipe yields 48 cookies, ideal for sharing at parties or enjoying over several days.
Tools and Preparation
Before you start baking, gather your tools and prepare your workspace for an efficient cooking experience.
Essential Tools and Equipment
- Stand mixer or hand mixer
- Mixing bowls
- Baking sheet
- Parchment paper (optional)
- Small saucepan
- Wire rack
Importance of Each Tool
- Stand mixer or hand mixer: Helps achieve a smooth dough by thoroughly mixing the butter and sugar.
- Mixing bowls: Essential for combining ingredients without making a mess.
- Baking sheet: Provides a sturdy base for baking your cookies evenly.
- Wire rack: Allows cookies to cool properly, preventing sogginess.
Ingredients
A great cookie for the holidays! Chocolate Mint Thumbprint Cookies are a soft chocolate thumbprint cookie with a mint fudge center drizzled in chocolate.
For the Cookie Dough
- 1 cup butter (room temperature)
- 2 cups white sugar
- 2 eggs
- 2 teaspoons vanilla extract
- 3 cups all-purpose flour
- 1 cup unsweetened cocoa powder
- ½ teaspoon salt
- ½ teaspoon baking soda
- ½ teaspoon baking powder
For the Fudge Center
- 2 ounces chocolate almond bark
- 1 ½ cups white chocolate chips
- ½ of 14 oz can sweetened condensed milk
- ½ teaspoon mint extract
- Green Food Coloring
How to Make Chocolate Mint Thumbprint Cookies
Step 1: Cream Butter and Sugar
In a large mixing bowl, cream together the butter and sugar until light and fluffy. Mix in the eggs one at a time. Add the vanilla extract and mix until combined.
Step 2: Combine Dry Ingredients
Add the cocoa powder, salt, baking soda, baking powder, and flour to the mixture. Stir until just combined.
Step 3: Shape the Cookies
Roll the dough into balls about 1 inch in diameter. Place them on a greased baking sheet or one lined with parchment paper. Press your thumb into each ball to create a well in the center.
Step 4: Bake the Cookies
Bake at 350 degrees Fahrenheit for about 12 minutes. If the thumbprints disappear during baking, gently press down again with the back of a wooden spoon or spatula. Allow cooling on the baking sheet for 2 minutes before transferring to a wire rack to cool completely.
Step 5: Prepare the Fudge Filling
In a small saucepan over medium heat, melt together the white chocolate chips and sweetened condensed milk while stirring continuously. Once melted, stir in the mint extract. Spoon this mixture into the centers of your cooled cookies.
Step 6: Drizzle Chocolate Over Cookies
Melt chocolate almond bark according to package directions. Drizzle over each cookie after adding the fudge filling. Allow the chocolate to set before serving or storing in an airtight container.
How to Serve Chocolate Mint Thumbprint Cookies
Chocolate Mint Thumbprint Cookies are not only delicious but also visually appealing, making them a perfect treat for various occasions. Here are some creative ways to serve them that will impress your guests.
Festive Dessert Platter
- Arrange the cookies on a colorful platter with other holiday treats like peppermint bark and gingerbread men. This creates a festive atmosphere.
Cookie Gift Jars
- Layer the cookies in a mason jar, adding some cocoa powder or peppermint candies between layers. Tie it with a ribbon for a thoughtful gift.
Hot Beverage Pairing
- Serve these cookies with a warm cup of hot chocolate or peppermint tea. The flavors complement each other perfectly for a cozy experience.
Dessert Table Display
- Include Chocolate Mint Thumbprint Cookies on your dessert table at parties. They add a unique touch alongside cakes and pastries.
Ice Cream Sandwiches
- For an indulgent treat, sandwich mint chocolate chip ice cream between two cookies. This transforms them into an exciting dessert option.
Coffee Break Treats
- Offer these cookies during coffee breaks at work or gatherings. Their rich flavor pairs well with both coffee and tea, providing an energy boost.
How to Perfect Chocolate Mint Thumbprint Cookies
To ensure your Chocolate Mint Thumbprint Cookies turn out perfectly every time, keep these tips in mind:
- Chill the Dough: Refrigerating the dough for at least 30 minutes helps maintain the cookie shape and prevents spreading during baking.
- Use Quality Ingredients: Opt for high-quality cocoa powder and chocolate chips. This enhances the overall flavor of the cookies.
- Measure Accurately: Use precise measurements for flour and sugar to achieve the right texture. Too much flour can make cookies dry.
- Don’t Overbake: Keep an eye on your cookies while they bake. They should be soft in the center when you remove them from the oven.
- Create Deeper Wells: Press your thumb firmly into the dough to create deeper wells for holding more fudge filling.
- Let Them Cool Completely: Allow cookies to cool completely before drizzling with chocolate to prevent melting and ensure neat presentation.
Best Side Dishes for Chocolate Mint Thumbprint Cookies
These delightful cookies can be enjoyed alongside various side dishes that enhance their flavors and textures. Here are some excellent pairings to consider:
- Peppermint Hot Chocolate: A rich drink topped with whipped cream and crushed candy canes that complements the minty flavor of the cookies.
- Vanilla Ice Cream: A classic pairing that balances the rich chocolate taste with creamy sweetness, enhancing your dessert experience.
- Fruit Salad: A refreshing mix of berries, melons, and citrus fruits provides contrast and lightens up the heavy chocolate flavors.
- Chocolate Fondue: Set up a chocolate fondue station where guests can dip their thumbprint cookies for an interactive dessert experience.
- Cheese Plate: Incorporate soft cheeses like brie or goat cheese paired with honey for a sweet-savory contrast that works well with chocolate.
- Nut Mix: A simple bowl of salted nuts adds crunchiness and saltiness, balancing out the sweetness of the thumbprint cookies.
- Spiced Chai Latte: The warm spices in chai enhance the minty cocoa flavors while creating a comforting beverage option alongside the cookies.
- Mini Fruit Tarts: These provide a lighter option with fresh fruit toppings that contrast nicely against the dense cookie texture.
Common Mistakes to Avoid
When making Chocolate Mint Thumbprint Cookies, there are a few common pitfalls to watch out for.
- Skipping the chilling step: Not chilling the dough can lead to cookies that spread too much during baking. Always refrigerate the dough for at least 30 minutes before baking.
- Incorrect oven temperature: Baking at the wrong temperature can cause cookies to bake unevenly. Use an oven thermometer to ensure it’s accurate and preheat properly.
- Overmixing the dough: Overmixing can make cookies tough. Mix just until ingredients are combined for a soft texture.
- Not measuring ingredients correctly: Accurate measurements are key in baking. Use dry measuring cups for flour and cocoa powder and level them off for precision.
- Ignoring the cooling time: Allowing cookies to cool on the baking sheet is essential. This helps them set properly; transferring them too soon can lead to breakage.
Refrigerator Storage
- Store in an airtight container.
- Keeps well for up to 1 week in the refrigerator.
- Layer cookies with parchment paper to prevent sticking.
Freezing Chocolate Mint Thumbprint Cookies
- Place cookies in a single layer on a baking sheet and freeze until firm.
- Transfer to an airtight freezer bag or container.
- They can be frozen for up to 3 months.
Reheating Chocolate Mint Thumbprint Cookies
- Oven: Preheat oven to 350°F (175°C). Place cookies on a baking sheet and heat for about 5-7 minutes until warm.
- Microwave: Place one cookie on a microwave-safe plate. Heat for about 10-15 seconds, checking regularly to avoid overheating.
- Stovetop: Use a skillet over low heat. Cover with a lid and warm for about 2-3 minutes, turning occasionally.
Frequently Asked Questions
Can I make Chocolate Mint Thumbprint Cookies ahead of time?
Yes, you can prepare the cookie dough ahead of time and store it in the refrigerator for up to 2 days before baking.
What variations can I try with Chocolate Mint Thumbprint Cookies?
You can experiment by adding different extracts like almond or using dark chocolate instead of white chocolate for the fudge center.
How do I ensure my thumbprints stay defined?
Make sure you press firmly into the center of each cookie before baking. If they lose their shape while baking, gently press down again with a spoon after removing them from the oven.
Are these cookies suitable for freezing?
Absolutely! Chocolate Mint Thumbprint Cookies freeze well, making them perfect for holiday batches or future treats.
Final Thoughts
Chocolate Mint Thumbprint Cookies are a delightful treat that brings together rich chocolate and refreshing mint flavors. Their versatility allows you to customize them with various fillings or toppings, making them suitable for any occasion. Give this recipe a try; you’ll love how simple yet delicious they are!

Chocolate Mint Thumbprint Cookies
Indulge in the delightful fusion of rich chocolate and refreshing mint with these Chocolate Mint Thumbprint Cookies. Perfect for any festive gathering, these soft cookies feature a luscious mint fudge center topped with a decadent chocolate drizzle. With their unique combination of flavors and textures, they are an irresistible addition to your dessert table. Easy to make, even novice bakers can whip up a batch of 48 cookies to share during holiday celebrations or enjoy over several days. The vibrant green fudge adds visual appeal, making them perfect for impressing guests at special occasions.
- Total Time: 32 minutes
- Yield: Approximately 48 cookies 1x
Ingredients
- 1 cup butter (room temperature)
- 2 cups white sugar
- 2 eggs
- 2 teaspoons vanilla extract
- 3 cups all-purpose flour
- 1 cup unsweetened cocoa powder
- ½ teaspoon salt
- ½ teaspoon baking soda
- ½ teaspoon baking powder
- 2 ounces chocolate almond bark
- 1 ½ cups white chocolate chips
- ½ can sweetened condensed milk
- ½ teaspoon mint extract
- green food coloring
Instructions
- Cream butter and sugar until light and fluffy. Mix in eggs one at a time and add vanilla extract.
- Combine dry ingredients (cocoa powder, salt, baking soda, baking powder, flour) into the mixture until just combined.
- Roll dough into balls (about 1 inch) on a greased or parchment-lined baking sheet and press your thumb into each ball to create wells.
- Bake at 350°F for about 12 minutes; ensure wells remain defined by pressing gently if needed.
- Cool for 2 minutes on the sheet before transferring to a wire rack.
- Melt white chocolate chips and sweetened condensed milk in a saucepan; stir in mint extract and fill cookie wells.
- Drizzle melted chocolate almond bark over cookies once fudge has set.
- Prep Time: 20 minutes
- Cook Time: 12 minutes
- Category: Dessert
- Method: Baking
- Cuisine: American
Nutrition
- Serving Size: 1 serving
- Calories: 115
- Sugar: 10g
- Sodium: 50mg
- Fat: 6g
- Saturated Fat: 3g
- Unsaturated Fat: 2g
- Trans Fat: 0g
- Carbohydrates: 14g
- Fiber: <1g
- Protein: 1g
- Cholesterol: 15mg
Keywords: Chill the dough for at least 30 minutes to prevent spreading. Use high-quality cocoa and chocolate for best flavor results. Feel free to customize fillings or toppings based on your taste preferences.