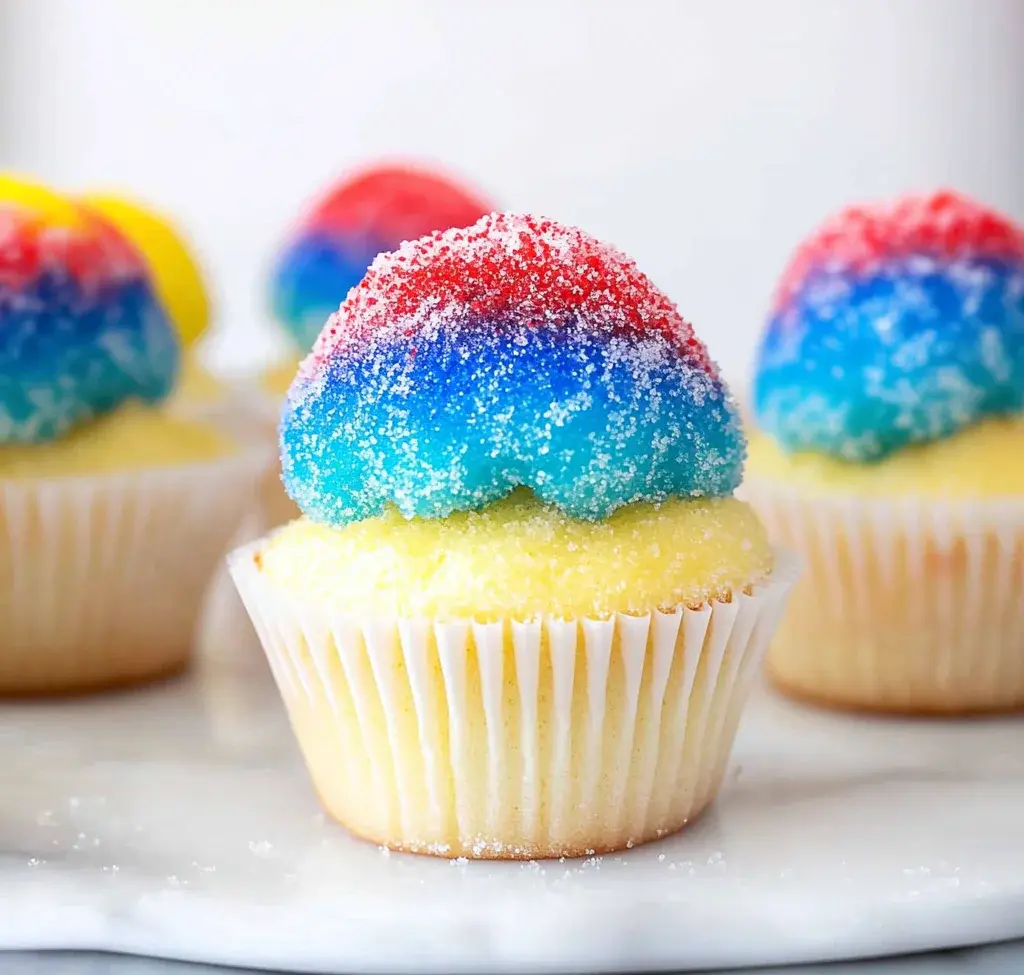
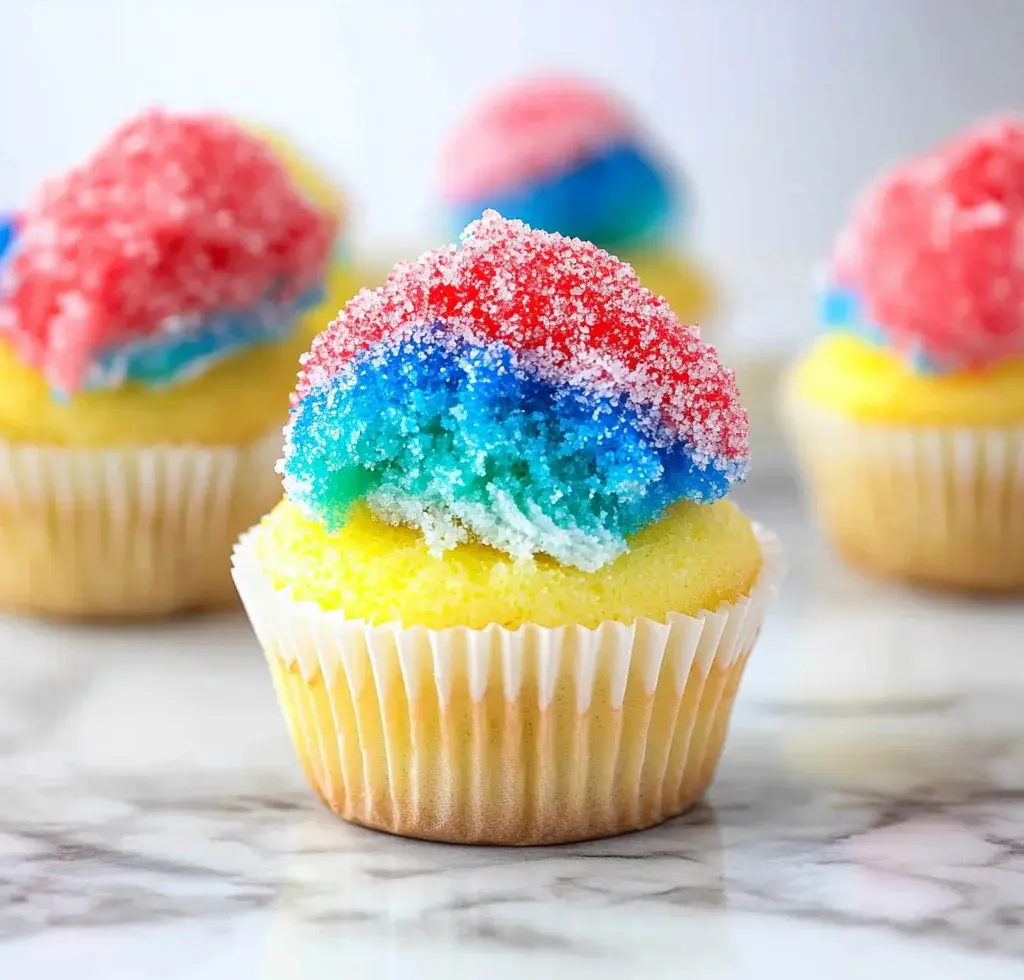
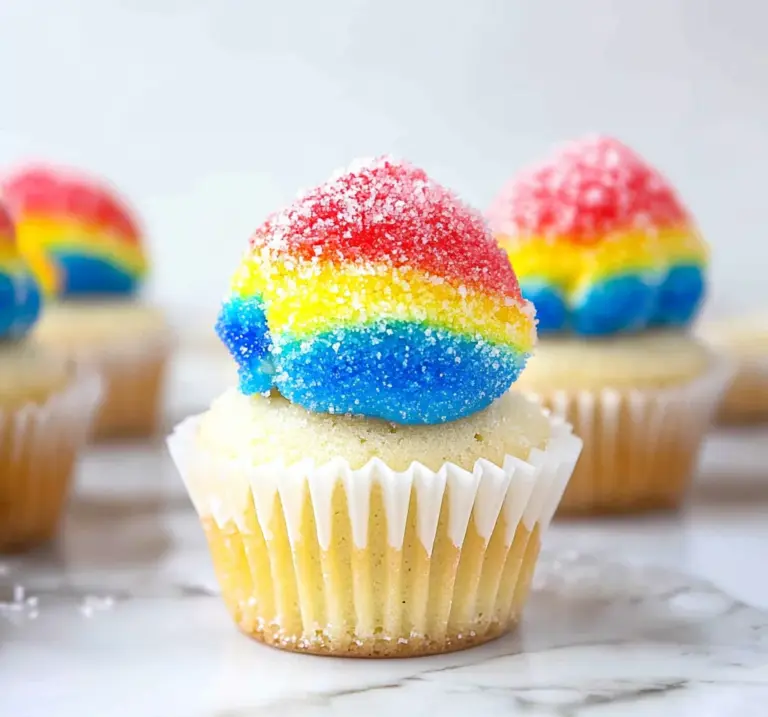
Bite-sized and vibrant, Snow Cone Mini Cupcakes are the ultimate summer treat that captures the joy of childhood snow cones in a delightful mini dessert. Perfect for birthday parties, summer picnics, or just because, these cupcakes are easy to make and decorate, making them a fun activity for kids and adults alike. With their colorful sanding sugar topping, they not only taste great but also look stunning on any dessert table!
Why You’ll Love This Recipe
- Easy to Make – With a simple cupcake base and quick frosting technique, you’ll have these ready in no time.
- Colorful Presentation – The bright sanding sugars give these cupcakes an eye-catching look that’s sure to impress guests.
- Versatile Flavor – The vanilla flavor pairs wonderfully with any seasonal fruits or toppings you want to add.
- Perfect for Any Occasion – Whether it’s a birthday party, summer barbecue, or holiday gathering, these cupcakes fit right in.
- Kid-Friendly Fun – Kids will love helping to decorate these mini treats with colorful sugars!
Tools and Preparation
Before diving into making your Snow Cone Mini Cupcakes, gather your tools for a smooth baking experience.
Essential Tools and Equipment
- Mini cupcake pan
- Mixing bowls
- Whisk or electric mixer
60 disher (scoop)
- Measuring cups and spoons
- Spatula
Importance of Each Tool
- Mini cupcake pan – This is crucial for creating perfectly sized cupcakes that fit the theme.
- Whisk or electric mixer – Ensures your batter is well-mixed for light and fluffy cupcakes.
- #60 disher (scoop) – Helps portion out the frosting evenly onto each cupcake.
Ingredients
Bite-sized, summer-ready treats topped with colorful sanding sugar, bringing all the fun of snow cones in a delightfully sweet bite!
For the Cupcakes
- vanilla cupcakes recipe/white boxed cake mix
For the Frosting
- vanilla buttercream
For Topping
- blue sanding sugar
- red sanding sugar
- yellow sanding sugar

How to Make Snow Cone Mini Cupcakes
Step 1: Bake Your Cupcakes
- Preheat your oven according to your cupcake recipe or boxed mix instructions.
- Bake up your favorite vanilla mini cupcakes or white boxed cake mix.
- Allow them to cool completely before frosting.
Step 2: Prepare the Buttercream
- Make up your favorite vanilla buttercream.
- Chill it in the refrigerator for 5-10 minutes; this makes for easier scooping.
Step 3: Set Up Sanding Sugars
- Using three small bowls, add blue sanding sugar, red sanding sugar, and yellow sanding sugar to each bowl respectively.
- Set aside.
Step 4: Frost Your Cupcakes
- Using a #60 disher, scoop vanilla buttercream onto each of your mini cupcakes.
Step 5: Decorate with Sanding Sugar
- Dip your frosted mini cupcakes into your choice of colored sanding sugars.
- Reshape frosting with your finger if necessary.
- Eat & Enjoy!
How to Serve Snow Cone Mini Cupcakes
Snow Cone Mini Cupcakes are not just a treat; they are a vibrant addition to any summer gathering. These colorful bites can be served in various fun ways, making them even more enjoyable for your guests.
Individual Cupcake Servings
- Serve each cupcake on its own for a simple and elegant presentation.
Cupcake Platter
- Arrange the mini cupcakes on a large platter, mixing colors for a festive look.
Party Favors
- Package cupcakes in clear bags tied with ribbons for delightful party favors that guests can take home.
Dessert Table Feature
- Incorporate these cupcakes into a themed dessert table, pairing them with other summer sweets.
Ice Cream Pairing
- Serve alongside small scoops of ice cream to complement the flavors and add variety.
How to Perfect Snow Cone Mini Cupcakes
Creating the perfect Snow Cone Mini Cupcakes is easy with a few helpful tips. Follow these suggestions to ensure each batch turns out delightful.
- Use fresh ingredients: Always opt for fresh butter and eggs when making your vanilla buttercream for the best flavor.
- Chill your frosting: Chilling the vanilla buttercream before frosting helps it hold shape better on the mini cupcakes.
- Colorful sanding sugar: Use vibrant sanding sugars to enhance visual appeal—choose high-quality brands for bright colors.
- Consistent cupcake size: Ensure all mini cupcakes are baked consistently by using a standard scoop or measuring cup.
- Frosting technique: Use a disher for even frosting amounts; this keeps each cupcake looking neat and uniform.
Best Side Dishes for Snow Cone Mini Cupcakes
These delightful mini cupcakes pair well with various side dishes, enhancing your dessert spread. Consider these options to complement your Snow Cone Mini Cupcakes perfectly.
- Fresh Fruit Salad: A refreshing mix of seasonal fruits adds color and balance to the sweetness of the cupcakes.
- Mini Hot Dogs: Bite-sized hot dogs provide a savory contrast that’s perfect for casual summer gatherings.
- Veggie Platter: A colorful array of fresh vegetables with dips offers a healthy option alongside sweet treats.
- Potato Chips: The crunch of salty potato chips can be an unexpected but delicious pairing with sweet desserts.
- Cheese Board: A selection of cheeses can bring diverse flavors that enhance the overall tasting experience.
- Ice Cream Sundae Bar: Set up an ice cream station where guests can create their own sundaes, adding another layer of fun!
Common Mistakes to Avoid
When making Snow Cone Mini Cupcakes, it’s easy to overlook some key steps. Here are common mistakes to watch for.
- Ignoring the cooling time: Allowing cupcakes to cool completely before frosting is crucial. If they’re warm, the frosting will melt and lose its shape.
- Skimping on buttercream: A thin layer of vanilla buttercream won’t give you the delightful snowy look. Use a generous scoop for that iconic snow cone effect.
- Not using proper sanding sugar: Regular sugar won’t provide the vibrant colors you want. Make sure to use colored sanding sugar for the best visual appeal.
- Overmixing the batter: This can make your cupcakes dense and heavy. Mix just until combined for light and fluffy results.
- Skipping the chilling step: Chilling your buttercream makes it easier to scoop and frost. Don’t rush this step; it’s worth the wait!
Storage & Reheating Instructions
Refrigerator Storage
- Store Snow Cone Mini Cupcakes in an airtight container.
- They will last up to 3 days in the refrigerator.
- Keep them away from strong-smelling foods to avoid flavor transfer.
Freezing Snow Cone Mini Cupcakes
- Freeze cupcakes un-frosted for best results.
- Place them in a freezer-safe container or wrap them tightly in plastic wrap.
- They can be frozen for up to 3 months.
Reheating Snow Cone Mini Cupcakes
- Oven: Preheat your oven to 350°F (175°C). Heat for about 5-10 minutes until warm.
- Microwave: Use a microwave-safe plate. Heat one cupcake at a time on low power for about 15-20 seconds.
- Stovetop: Place a cupcake in a non-stick skillet over low heat, cover, and warm for about 2-3 minutes.
Frequently Asked Questions
Here are some common questions about Snow Cone Mini Cupcakes that can help enhance your baking experience.
Can I use a different flavor of cupcake?
Yes! You can easily swap vanilla cupcakes with chocolate or any other flavor you prefer.
How do I make Snow Cone Cake Pops?
To create Snow Cone Cake Pops, crumble cooled mini cupcakes, mix with frosting, form into balls, and dip in colored chocolate or sanding sugars.
What if I can’t find colored sanding sugar?
You can make your own by mixing granulated sugar with food coloring until you achieve your desired shade.
How long do these cupcakes last?
Snow Cone Mini Cupcakes last up to three days when stored properly in an airtight container in the refrigerator.
Final Thoughts
Snow Cone Mini Cupcakes are not only adorable but also versatile treats perfect for summer gatherings. Their customizable toppings allow creativity, making them suitable for various occasions. Try experimenting with different flavors and colors for a unique twist!
Snow Cone Mini Cupcakes
Snow Cone Mini Cupcakes are a delightful summer treat that captures the nostalgic flavor of classic snow cones in a charming bite-sized dessert. These colorful mini cupcakes are perfect for any occasion—from birthday parties to summer barbecues. With a simple vanilla cupcake base topped with creamy vanilla buttercream and vibrant sanding sugars, they add a fun pop of color to your dessert table. Not only are they easy to make and decorate, but they also provide an enjoyable baking experience for both kids and adults alike.
- Total Time: 35 minutes
- Yield: Approximately 24 mini cupcakes
Ingredients
- Vanilla cupcakes (from scratch or boxed mix)
- Vanilla buttercream
- Blue sanding sugar
- Red sanding sugar
- Yellow sanding sugar
Instructions
- Preheat oven according to your recipe or boxed mix instructions.
- Bake mini vanilla cupcakes; allow to cool completely.
- Prepare vanilla buttercream and chill for easier frosting.
- Scoop buttercream onto cooled cupcakes using a disher.
- Dip frosted cupcakes into colored sanding sugars for decoration.
- Prep Time: 20 minutes
- Cook Time: 15 minutes
- Category: Dessert
- Method: Baking
- Cuisine: American
Nutrition
- Serving Size: 1 mini cupcake (30g)
- Calories: 120
- Sugar: 12g
- Sodium: 45mg
- Fat: 6g
- Saturated Fat: 3g
- Unsaturated Fat: 2g
- Trans Fat: 0g
- Carbohydrates: 16g
- Fiber: 0g
- Protein: 1g
- Cholesterol: 15mg
Keywords: Use high-quality sanding sugars for vibrant colors. Ensure cupcakes are completely cooled before frosting to maintain shape. Get creative with flavors by incorporating seasonal fruits as toppings.