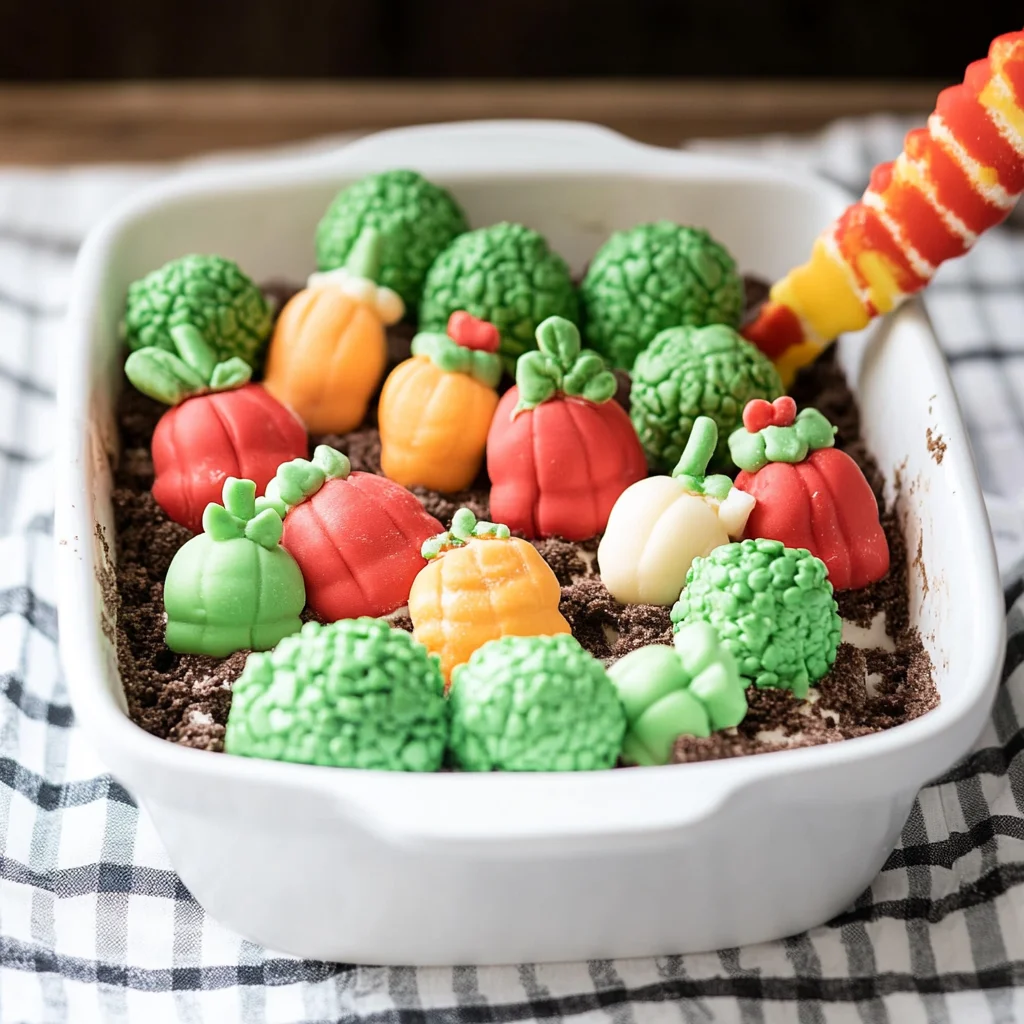
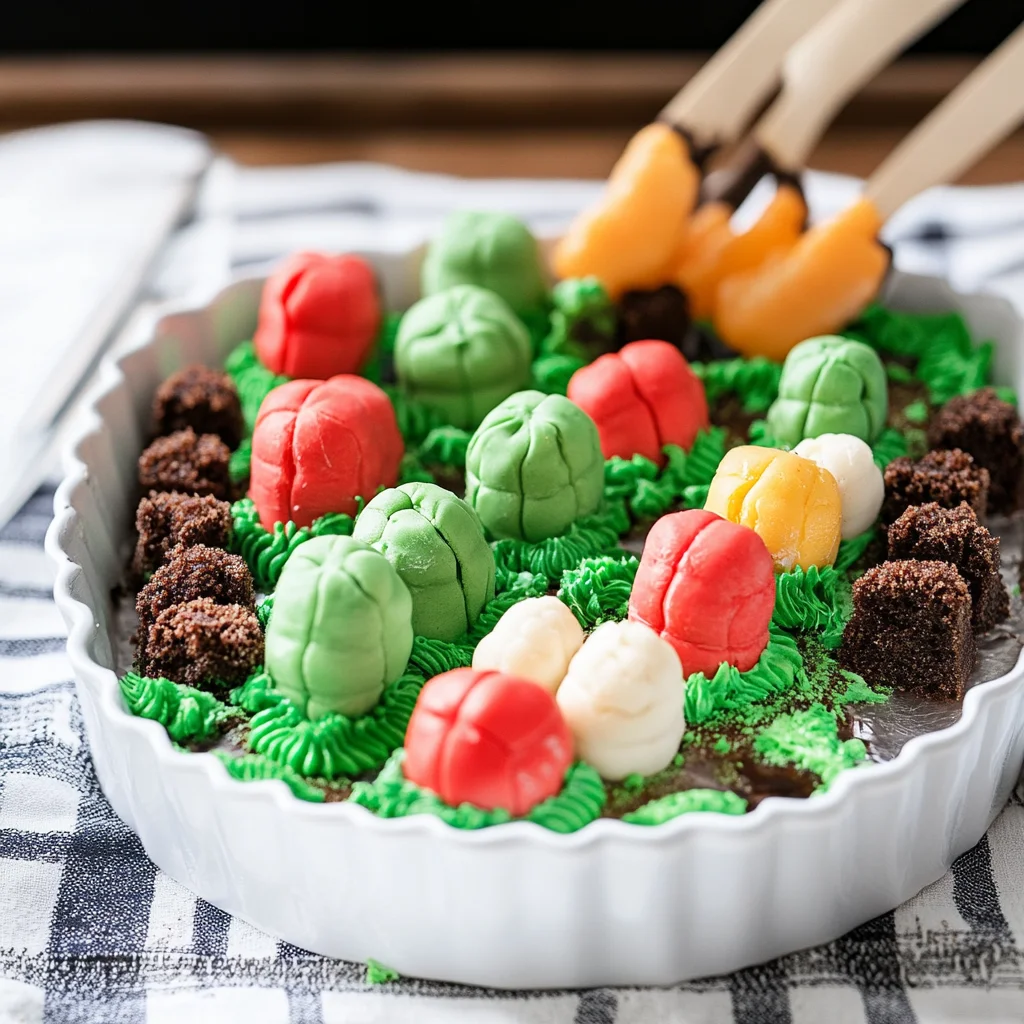
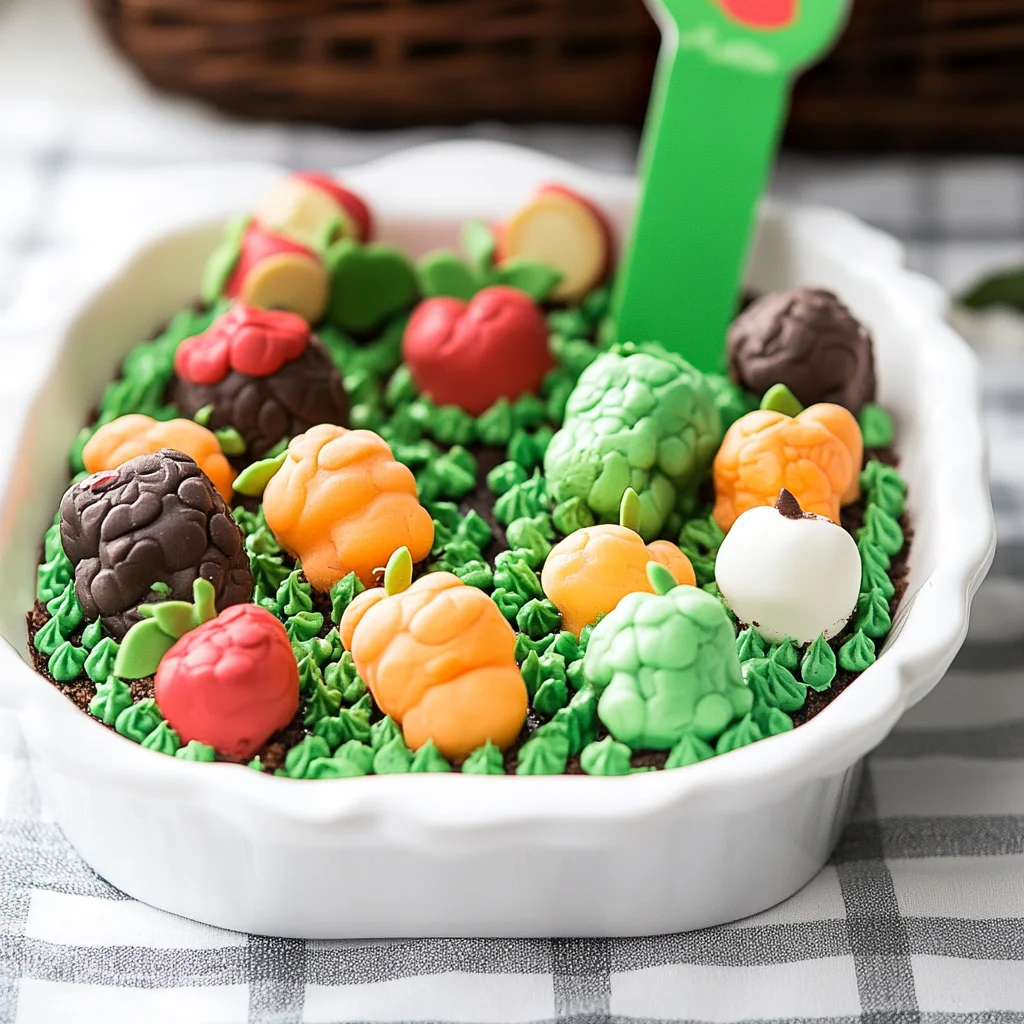
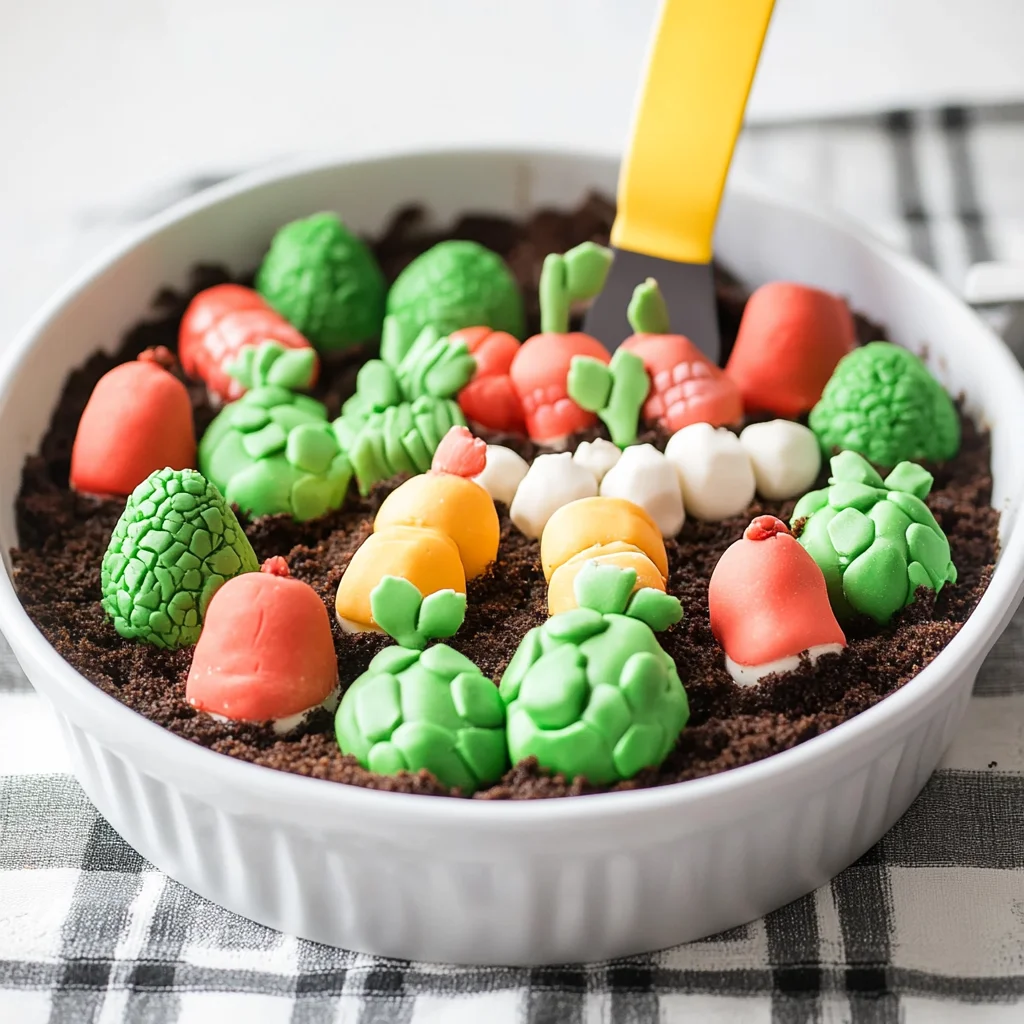
These Vegetable Garden Mini Cakes are a whimsical and delightful treat, perfect for spring and summer gatherings. Shaped like your favorite garden vegetables, these mini cakes not only look adorable but also taste amazing. They are versatile enough for birthday parties, picnics, or even as a fun dessert for family dinners. With their colorful glaze and unique presentation, they are sure to be the highlight of any occasion.
Why You’ll Love This Recipe
- Unique Presentation: Shaped like garden vegetables, these mini cakes will impress your guests.
- Delicious Flavor: Infused with shredded carrots, these cakes offer a sweet and moist bite.
- Easy to Make: With straightforward steps, even novice bakers can whip up these treats with confidence.
- Versatile Decoration: Customize the glaze and garnish to fit any theme or occasion.
- Perfect Portion Size: Mini cakes mean you can enjoy dessert without overindulging.
Tools and Preparation
Before you start baking your Vegetable Garden Mini Cakes, gather a few essential tools. Having everything ready will make the process smoother and more enjoyable.
Essential Tools and Equipment
- Stand mixer
- Baking spray
- Mixing bowls
- Whisk
- Pastry bag
Importance of Each Tool
- Stand mixer: Makes creaming butter and sugar effortless, ensuring a smooth batter.
- Baking spray: Prevents sticking, helping your mini cakes release easily from the pan.
- Mixing bowls: Essential for combining ingredients efficiently without spills or mess.
Ingredients
To create these delightful Vegetable Garden Mini Cakes, you’ll need the following ingredients:
For the Cake
- 1 1/2 cups finely shredded carrots
- 1 cup brown sugar
- 1/2 cup butter (melted)
- 2 eggs
- 1 teaspoon vanilla extract
- 1 cup all-purpose flour
- 1 teaspoon baking powder
- 1/2 teaspoon ground cinnamon
- 1/4 teaspoon salt
- 1/3 cup buttermilk
For the Glaze
- 1 1/2 cups confectioners’ sugar
- 4-5 tablespoons half and half
- 1/2 teaspoon vanilla extract
- food coloring
For Garnish
- Crushed chocolate graham cracker crumbs
How to Make Vegetable Garden Mini Cakes
Step 1: Preheat the Oven
Begin by preheating your oven to 350 degrees F (175 degrees C). This ensures that your mini cakes bake evenly.
Step 2: Prepare Your Baking Pan
Spray your baking pan with baking spray. Use a pastry brush to coat every corner thoroughly so that the cakes come out easily once baked.
Step 3: Cream Together Sugar and Butter
In the bowl of a stand mixer, combine the brown sugar and melted butter. Beat until well-blended. Then add in the eggs and vanilla extract; mix until smooth.
Step 4: Combine Dry Ingredients
In a medium bowl, whisk together the all-purpose flour, baking powder, cinnamon, and salt. Gradually add half of this mixture to your sugar-butter blend. Mix for a few seconds before adding in buttermilk; combine again briefly. Finally, stir in the remaining dry ingredients along with finely shredded carrots until just combined.
Step 5: Fill Your Baking Pan
Using a teaspoon, fill each cavity in your baking pan about three-quarters full with batter. Be careful not to overfill them as they will rise while baking. Lightly tap the pan on the counter to settle the batter evenly.
Step 6: Bake
Place your filled pan in the oven and bake for 14-16 minutes or until a toothpick inserted into the center comes out clean. Let them cool in the pan for about 5-8 minutes before transferring them to a cooling rack.
Step 7: Prepare Your Glaze
In a medium-sized bowl, start with confectioners’ sugar. Gradually add half-and-half one tablespoon at a time until you reach your desired consistency. Mix in vanilla extract and food coloring if desired.
Step 8: Whisk Until Smooth
Continue whisking until your glaze is completely smooth with no lumps of sugar remaining.
Step 9: Drizzle Glaze Over Cakes
Once cooled, use a pastry bag to drizzle each mini cake generously with glaze. Allow it to set before garnishing with crushed chocolate graham cracker crumbs for an extra touch of flavor and texture.
Now you’re ready to serve these delightful Vegetable Garden Mini Cakes at your next gathering! Enjoy!
How to Serve Vegetable Garden Mini Cakes
These delightful Vegetable Garden Mini Cakes are perfect for any gathering. Their charming design and delicious flavor make them an instant hit. Here are some serving suggestions to enhance your presentation.
For a Garden Party
- Colorful Platter: Arrange the mini cakes on a vibrant platter with edible flowers to create a stunning centerpiece.
- Individual Servings: Place each mini cake in cupcake liners for a fun, individual touch that makes it easy for guests to grab and enjoy.
As Part of a Dessert Table
- Mixed Desserts: Pair the mini cakes with other treats like cookies and brownies for a varied dessert experience.
- Themed Decor: Use garden-themed decorations like small pots or gardening tools to complement the mini cakes’ appearance.
At Seasonal Gatherings
- Easter Brunch: Serve these mini cakes alongside fresh fruit and yogurt for a light, festive brunch option.
- Picnic Treats: Pack them in a picnic basket as a sweet surprise that’s easy to transport.
How to Perfect Vegetable Garden Mini Cakes
To achieve the best results when making your Vegetable Garden Mini Cakes, consider these helpful tips.
- Bold Mixing Technique: Ensure that you mix your batter just until combined. Overmixing can lead to dense cakes.
- Bold Accurate Measurement: Use precise measurements for ingredients, especially flour, to maintain the right texture.
- Bold Oven Check: Always check your oven temperature with an oven thermometer for accuracy, ensuring even baking.
- Bold Cooling Time: Allow the cakes to cool completely before glazing; this helps prevent the glaze from melting off.
- Bold Creative Garnish: Experiment with different types of edible decorations like fresh herbs or fruit zests for added flair.
- Bold Storage Tips: Store any leftovers in an airtight container at room temperature, keeping them fresh and moist.
Best Side Dishes for Vegetable Garden Mini Cakes
Serving side dishes alongside your Vegetable Garden Mini Cakes can elevate the meal experience. Here are some delightful options to pair with these charming treats.
- Fresh Fruit Salad: A medley of seasonal fruits adds freshness and balances the sweetness of the mini cakes.
- Creamy Coleslaw: The crunchiness of coleslaw provides texture contrast and complements the soft mini cakes beautifully.
- Savory Quiche: A slice of vegetable quiche offers a hearty option that pairs well with sweet desserts.
- Cheese Platter: Include various cheeses such as brie, cheddar, and goat cheese for a sophisticated touch that enhances flavors.
- Spring Pea Soup: This light soup adds elegance and is perfect as a starter before indulging in dessert.
- Garlic Breadsticks: Offer warm, buttery breadsticks as a savory side that contrasts nicely with the sweetness of the cakes.
Common Mistakes to Avoid
Making Vegetable Garden Mini Cakes can be fun, but there are some common mistakes that can lead to less-than-perfect results. Here are a few pitfalls to watch out for:
- Incorrectly measuring ingredients: Always use measuring cups and spoons for accuracy. Too much or too little of an ingredient can alter the texture and flavor of your mini cakes.
- Overmixing the batter: Mixing too long can make the cakes tough. Mix just until combined to keep them light and airy.
- Skipping the cooling time: Allowing the cakes to cool before glazing is essential. Glazing too soon can cause it to melt off, ruining your presentation.
- Not greasing the pan properly: Ensure your baking pan is well-greased to prevent sticking. A stuck cake can break apart when you try to remove it.
- Ignoring oven temperature: Every oven is different. Use an oven thermometer if needed, as baking at the wrong temperature can lead to uneven baking.
Storage & Reheating Instructions
Refrigerator Storage
- Store your Vegetable Garden Mini Cakes in an airtight container.
- They will stay fresh for up to 5 days in the refrigerator.
- Separate layers with parchment paper to avoid sticking.
Freezing Vegetable Garden Mini Cakes
- Wrap each mini cake tightly in plastic wrap before placing them in a freezer-safe container.
- They can be frozen for up to 3 months.
- Thaw them overnight in the refrigerator before serving.
Reheating Vegetable Garden Mini Cakes
- Oven: Preheat your oven to 350°F (175°C) and place the mini cakes on a baking sheet. Heat for about 10 minutes, or until warmed through.
- Microwave: Place a mini cake on a microwave-safe plate and heat for 15-20 seconds. Check if it’s warm enough; avoid overheating as it may dry out.
- Stovetop: Place in a covered skillet over low heat for about 5 minutes, turning occasionally until warmed through.
Frequently Asked Questions
How do I customize my Vegetable Garden Mini Cakes?
You can add different food colorings to create a variety of vegetable shapes and colors! Consider using different frostings or toppings like nuts or sprinkles for added flair.
Can I make these mini cakes ahead of time?
Yes! You can bake and glaze them a day ahead. Just store them properly in the refrigerator until you’re ready to serve.
What occasions are best for serving Vegetable Garden Mini Cakes?
These mini cakes are perfect for spring celebrations, garden parties, and even Easter brunches. Their unique shape makes them a fun treat!
How do I ensure my mini cakes come out perfectly shaped?
Make sure not to overfill your baking pan and gently bang it on the counter before baking. This helps level the batter evenly.
Can I adapt this recipe for dietary restrictions?
Absolutely! You can substitute gluten-free flour or dairy-free alternatives for butter and buttermilk if needed, making this recipe versatile for various diets.
Final Thoughts
These Vegetable Garden Mini Cakes are not only adorable but also versatile treats that bring joy to any gathering. With endless customization options, you can easily tailor them to fit any occasion or personal taste. Give this delightful recipe a try and impress your guests with these charming little desserts!

Vegetable Garden Mini Cakes
Indulge in the charm of Vegetable Garden Mini Cakes, whimsical treats that bring the essence of spring and summer gatherings to your dessert table. These delightful mini cakes are shaped like your favorite garden vegetables and are infused with shredded carrots for a moist and flavorful bite. Perfect for birthday parties, picnics, or family dinners, they boast vibrant glazes and customizable decorations that will impress your guests. Easy to make, these mini cakes are portioned just right, allowing you to enjoy a sweet treat without overindulging. Elevate your next gathering with these adorable desserts that are sure to be the highlight of any occasion.
- Total Time: 31 minutes
- Yield: Approximately 12 servings 1x
Ingredients
- 1 1/2 cups finely shredded carrots
- 1 cup brown sugar
- 1/2 cup melted butter
- 2 eggs
- 1 teaspoon vanilla extract
- 1 cup all-purpose flour
- 1 teaspoon baking powder
- 1/2 teaspoon ground cinnamon
- 1/4 teaspoon salt
- 1/3 cup buttermilk
Instructions
- Preheat oven to 350°F (175°C) and prepare your baking pan with baking spray.
- In a stand mixer, blend the brown sugar and melted butter until smooth, then mix in eggs and vanilla.
- In another bowl, whisk together flour, baking powder, cinnamon, and salt. Gradually add to the wet mixture along with buttermilk and shredded carrots until just combined.
- Fill each cavity of the prepared pan three-quarters full and bake for 14-16 minutes or until a toothpick comes out clean.
- Prepare glaze by mixing confectioners' sugar with half-and-half until desired consistency is reached; add color if desired.
- Once cooled, drizzle glaze over each mini cake and garnish with crushed chocolate graham cracker crumbs.
- Prep Time: 15 minutes
- Cook Time: 16 minutes
- Category: Dessert
- Method: Baking
- Cuisine: American
Nutrition
- Serving Size: 1 mini cake (45g)
- Calories: 159
- Sugar: 10g
- Sodium: 120mg
- Fat: 7g
- Saturated Fat: 4g
- Unsaturated Fat: 2g
- Trans Fat: 0g
- Carbohydrates: 22g
- Fiber: 0g
- Protein: 2g
- Cholesterol: 34mg
Keywords: For added flair, experiment with different food colorings for unique vegetable shapes. These mini cakes can be baked ahead of time; just store them properly in the refrigerator until ready to serve.